Create a Website with Nginx
Create a Website with Nginx
When you launch a new WordPress site on FlyWP, Nginx (pronounced “engine-ex”) is the web server handling every visitor request — and it’s the reason your site loads fast with minimal resource usage. This guide walks you through each step of the site creation wizard so you know exactly what you’re configuring and why.
Prerequisites
Before creating a site, make sure you have:
- An active server in FlyWP (see Connecting a Server)
- A domain name pointed to your server’s IP address (optional — you can use a free test domain)
Step 1: Start the Site Creation Wizard
Navigate to your server’s dashboard and click + Create New Site, then select WordPress. This opens the multi-step creation wizard.
Your server’s details — name, Ubuntu version, location, and IP address — appear at the top of the wizard for reference.
Step 2: Domain Configuration
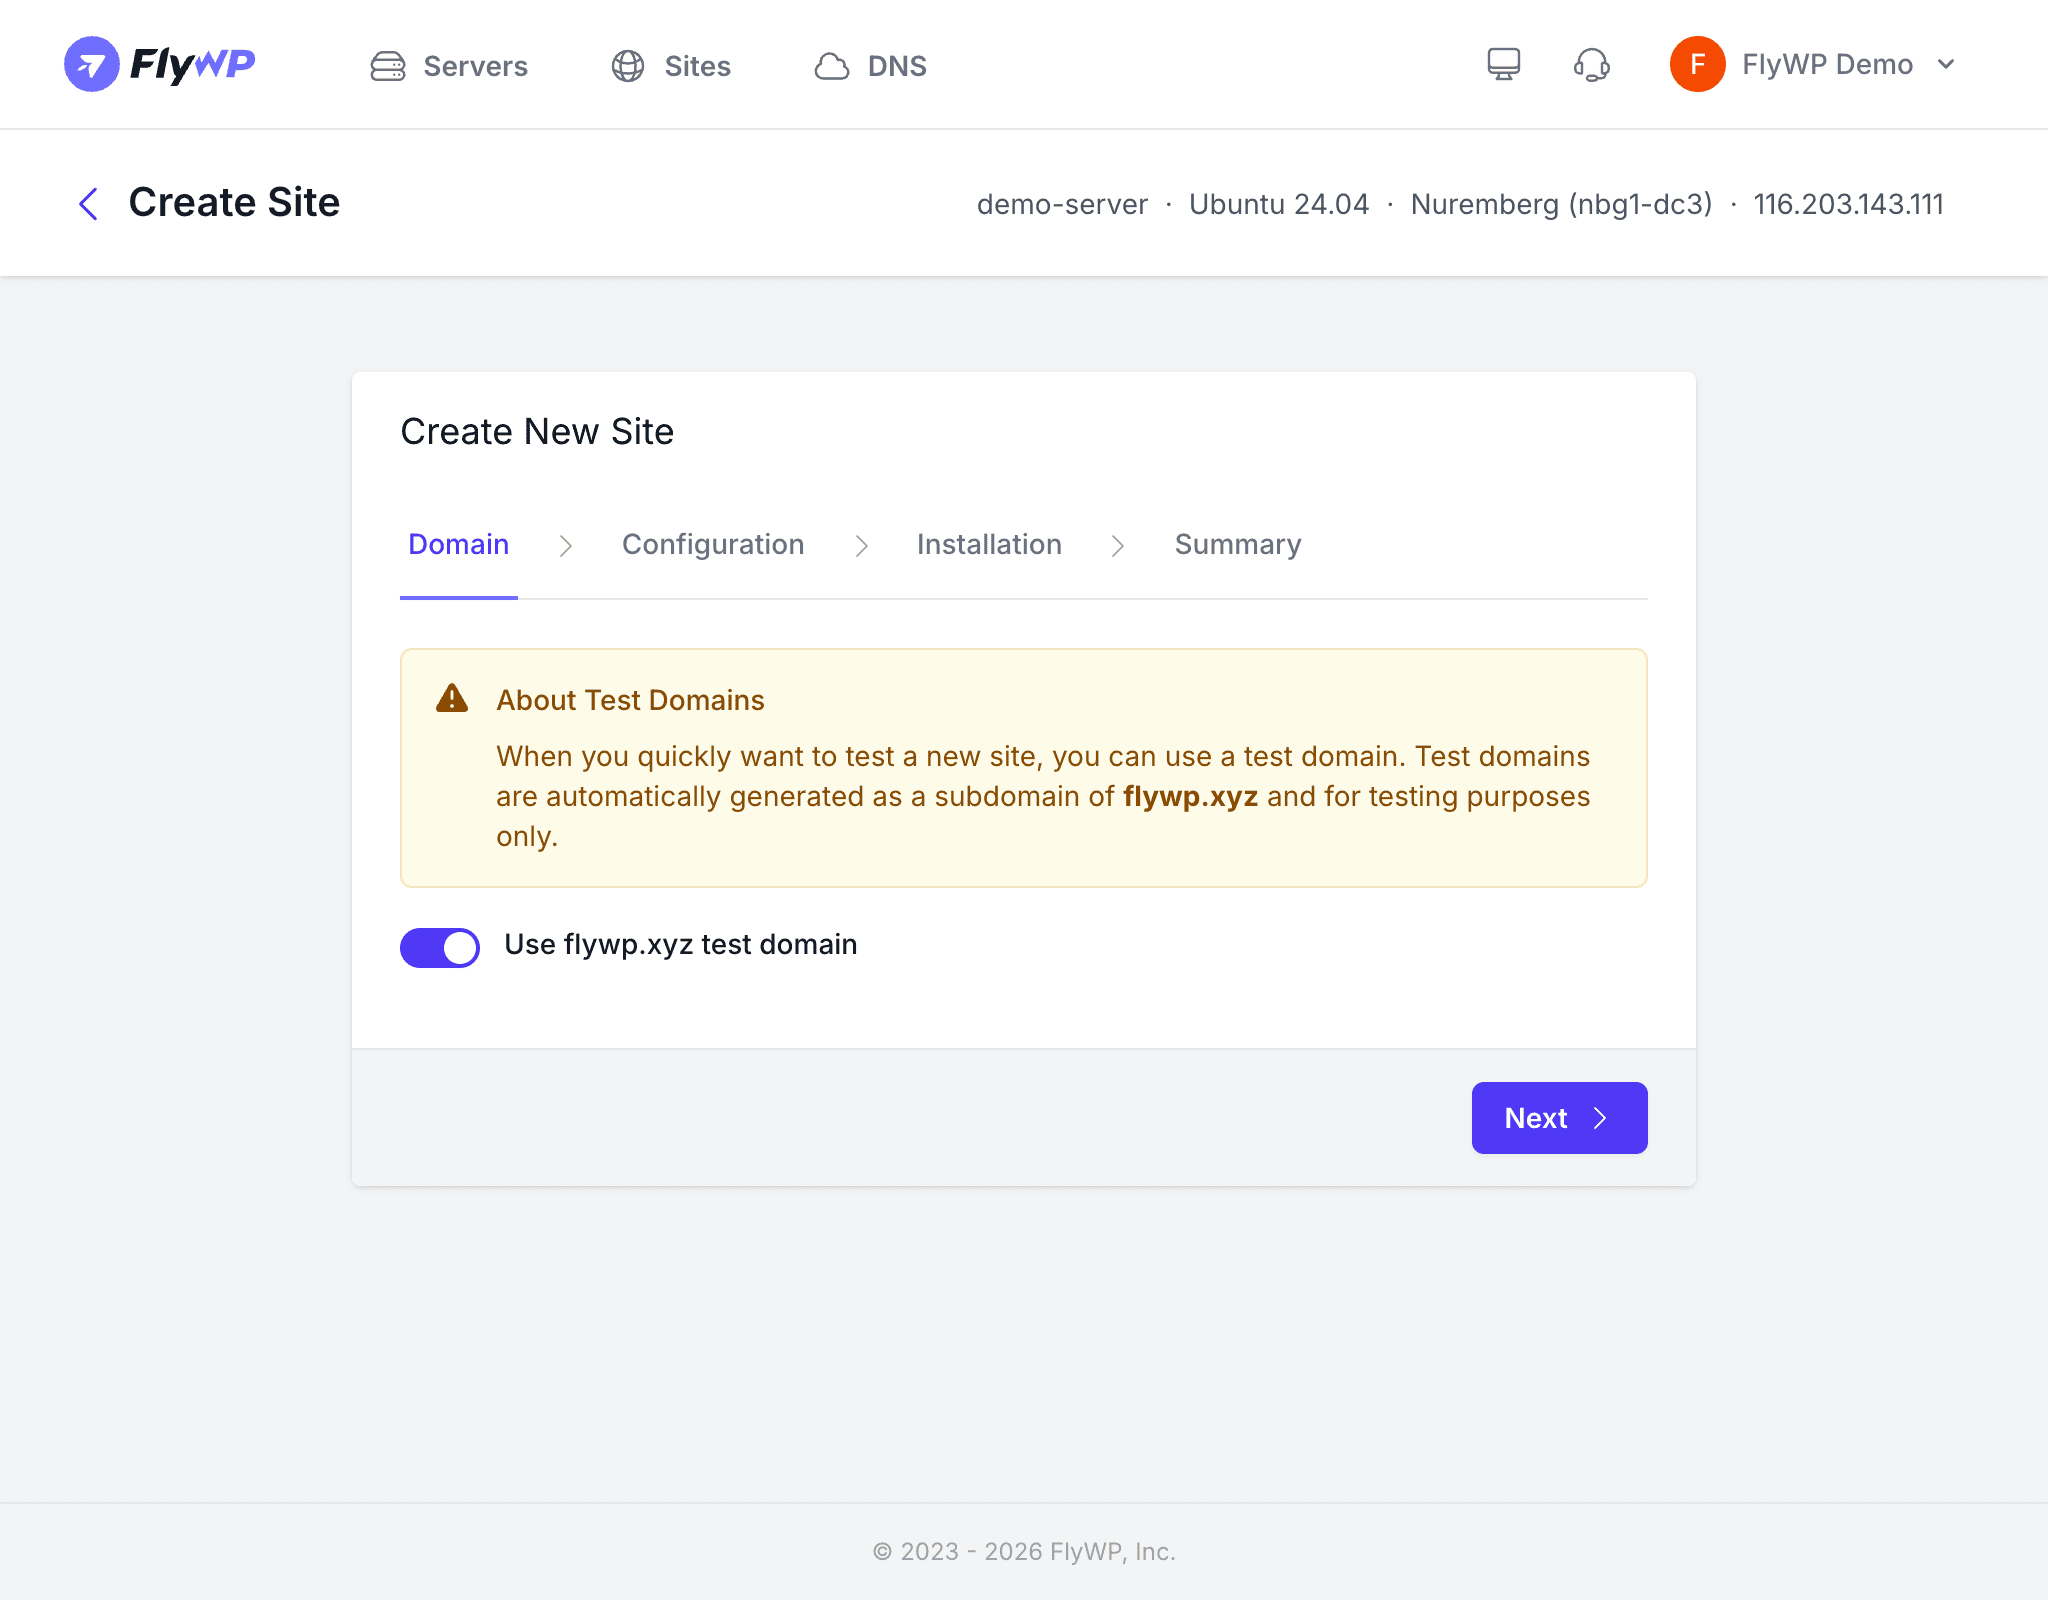
Choose how you want visitors (and you) to reach your site:
- Custom domain — Enter your own domain (e.g.,
example.com). Make sure the domain’s DNS A record (the setting that maps your domain name to a server’s IP address) already points to your server’s IP before enabling SSL. - Test domain — Check the test domain option to get a free
.flywp.xyzsubdomain. This works well for staging sites or quick experiments.
Optional settings on this step:
- Add Cloudflare DNS Record — If you have Cloudflare connected in FlyWP, toggle this on to automatically create the DNS record pointing your domain to the server. Cloudflare is a service that manages domain routing and can also protect your site from attacks.
- Enable HTTPS — Toggle this to provision a free SSL certificate (the technology that encrypts traffic between your visitors and your server) via Let’s Encrypt. Your domain must resolve to the server’s IP for this to succeed.
If you enable HTTPS with a custom domain, the domain must already point to your server’s IP address. Otherwise, the Let’s Encrypt certificate provisioning will fail. You can always enable SSL later from the site settings.
Step 3: Server Stack and PHP Version
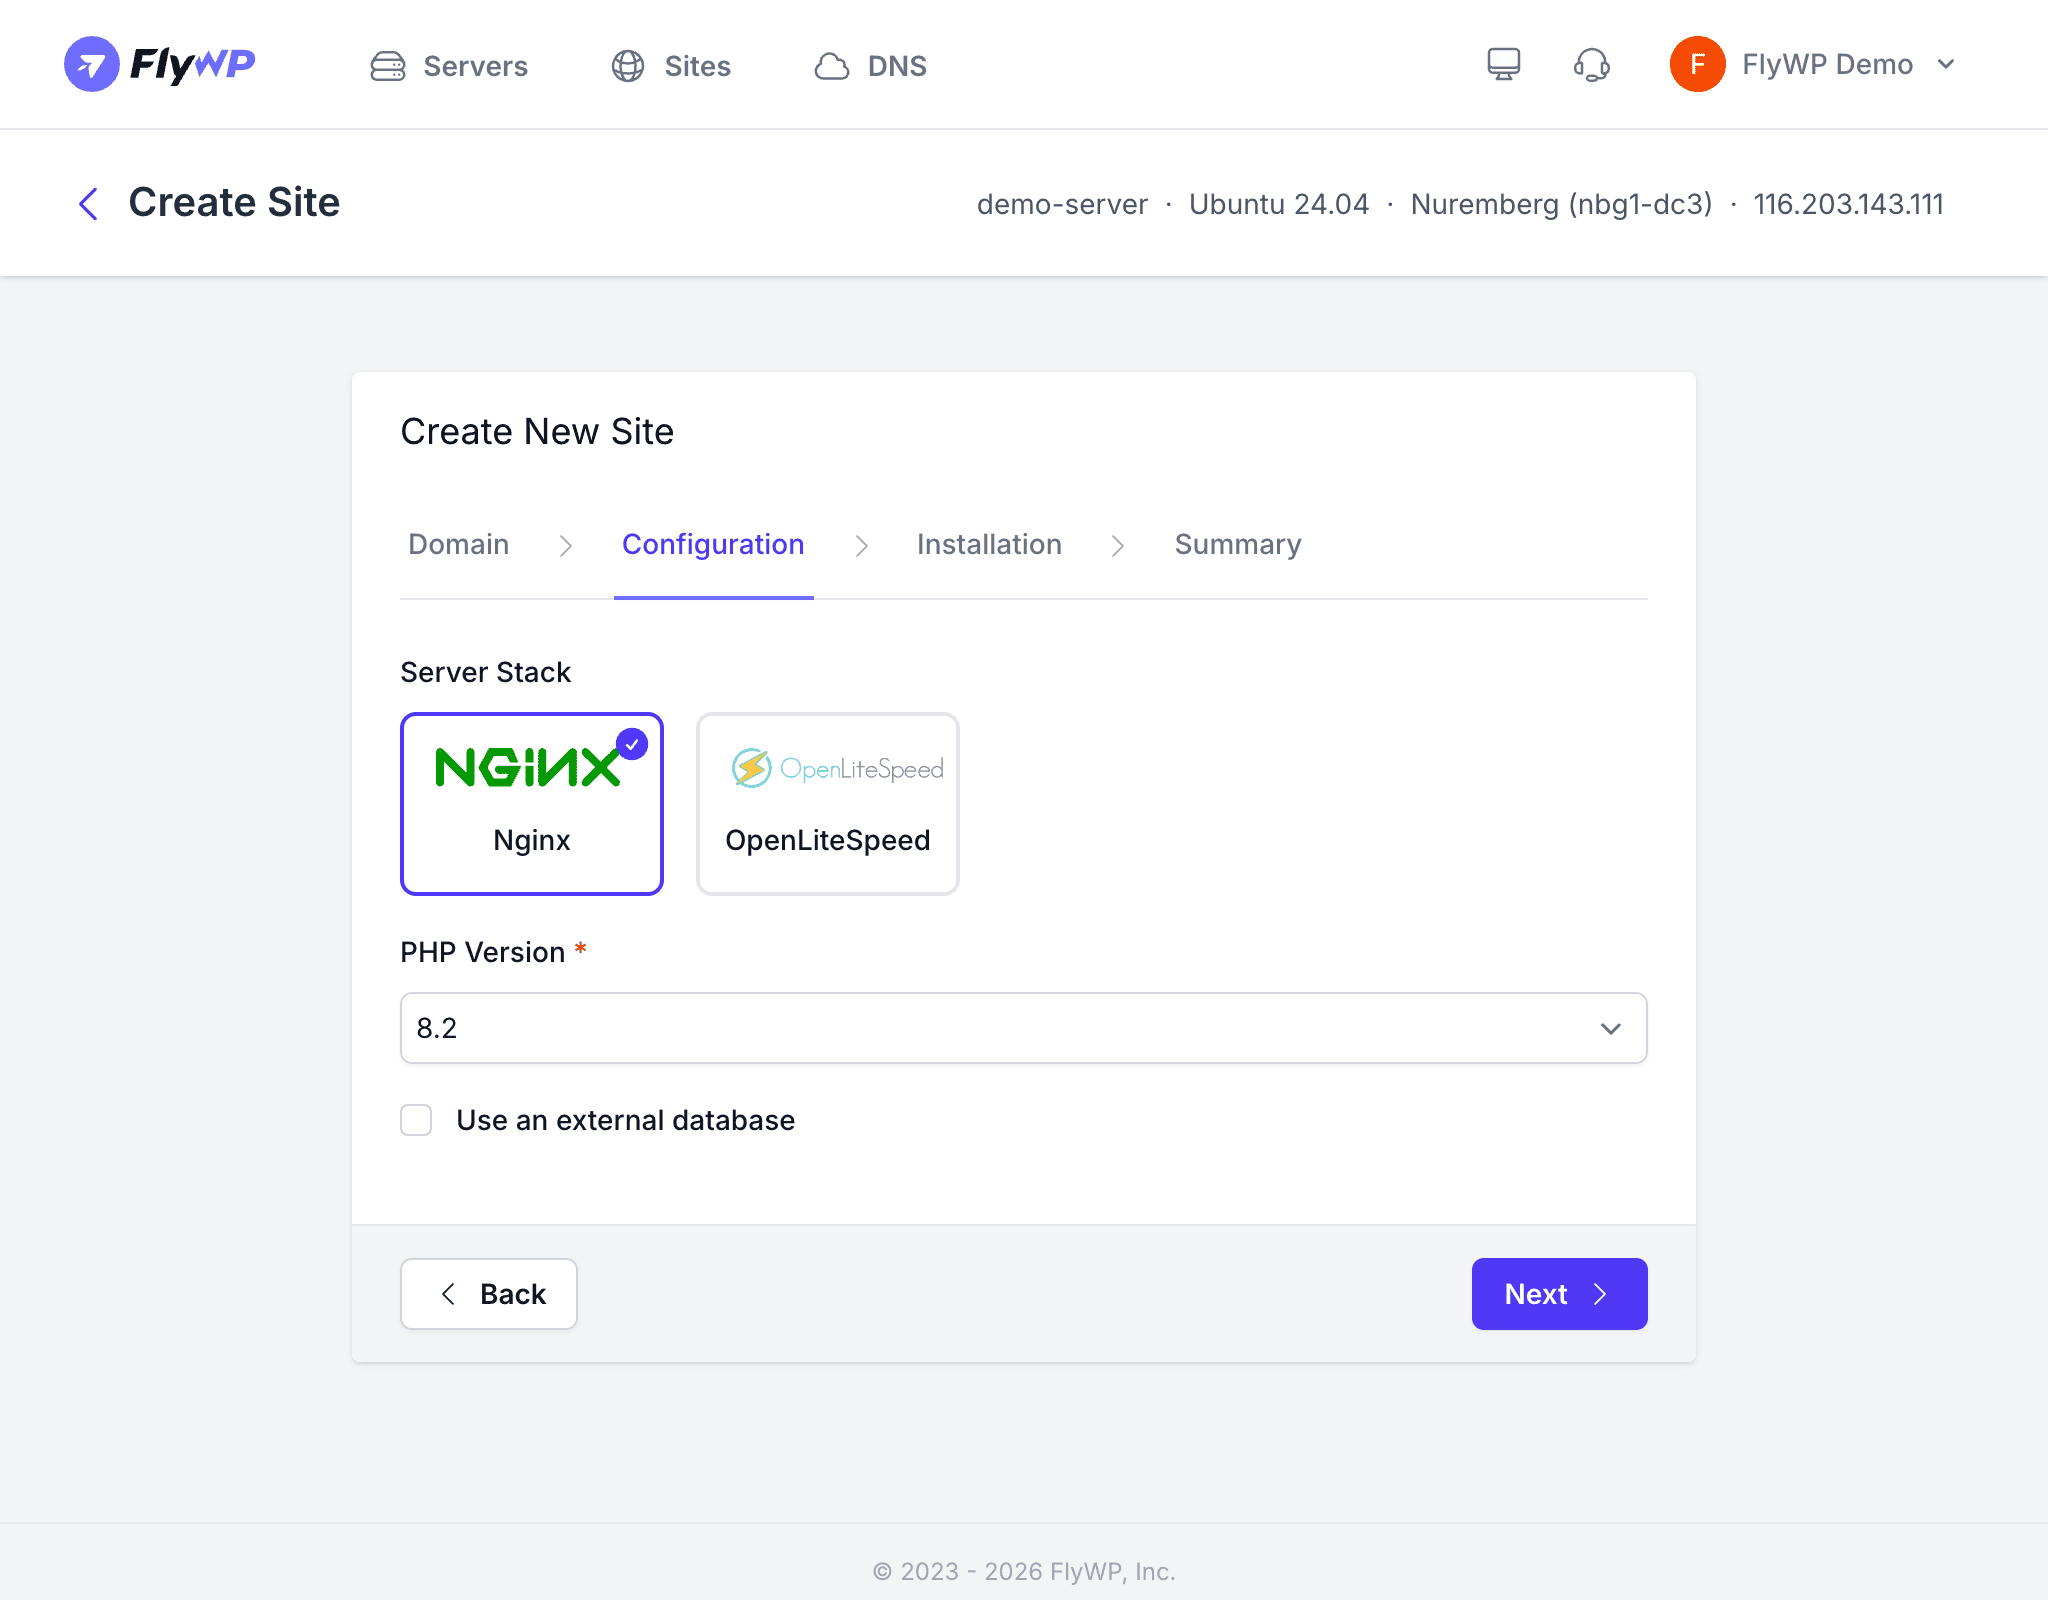
On the configuration step, select Nginx as your server stack. Nginx comes pre-selected by default on most servers.
Next, choose your PHP version — PHP is the programming language that powers WordPress. The version you pick affects performance, security, and plugin compatibility:
| PHP Version | Status |
|---|---|
| 8.4 | Latest, recommended for new sites |
| 8.3 | Stable, widely supported |
| 8.2 | Stable |
| 8.1 | Supported |
| 8.0 | Older, check plugin compatibility |
| 7.4 | Legacy only |
External database — If you want to use a database hosted outside this server (such as a managed MySQL service from your cloud provider), toggle the external database option and enter the connection details. For most users, the built-in database is the most straightforward choice.
Step 4: WordPress Installation Details
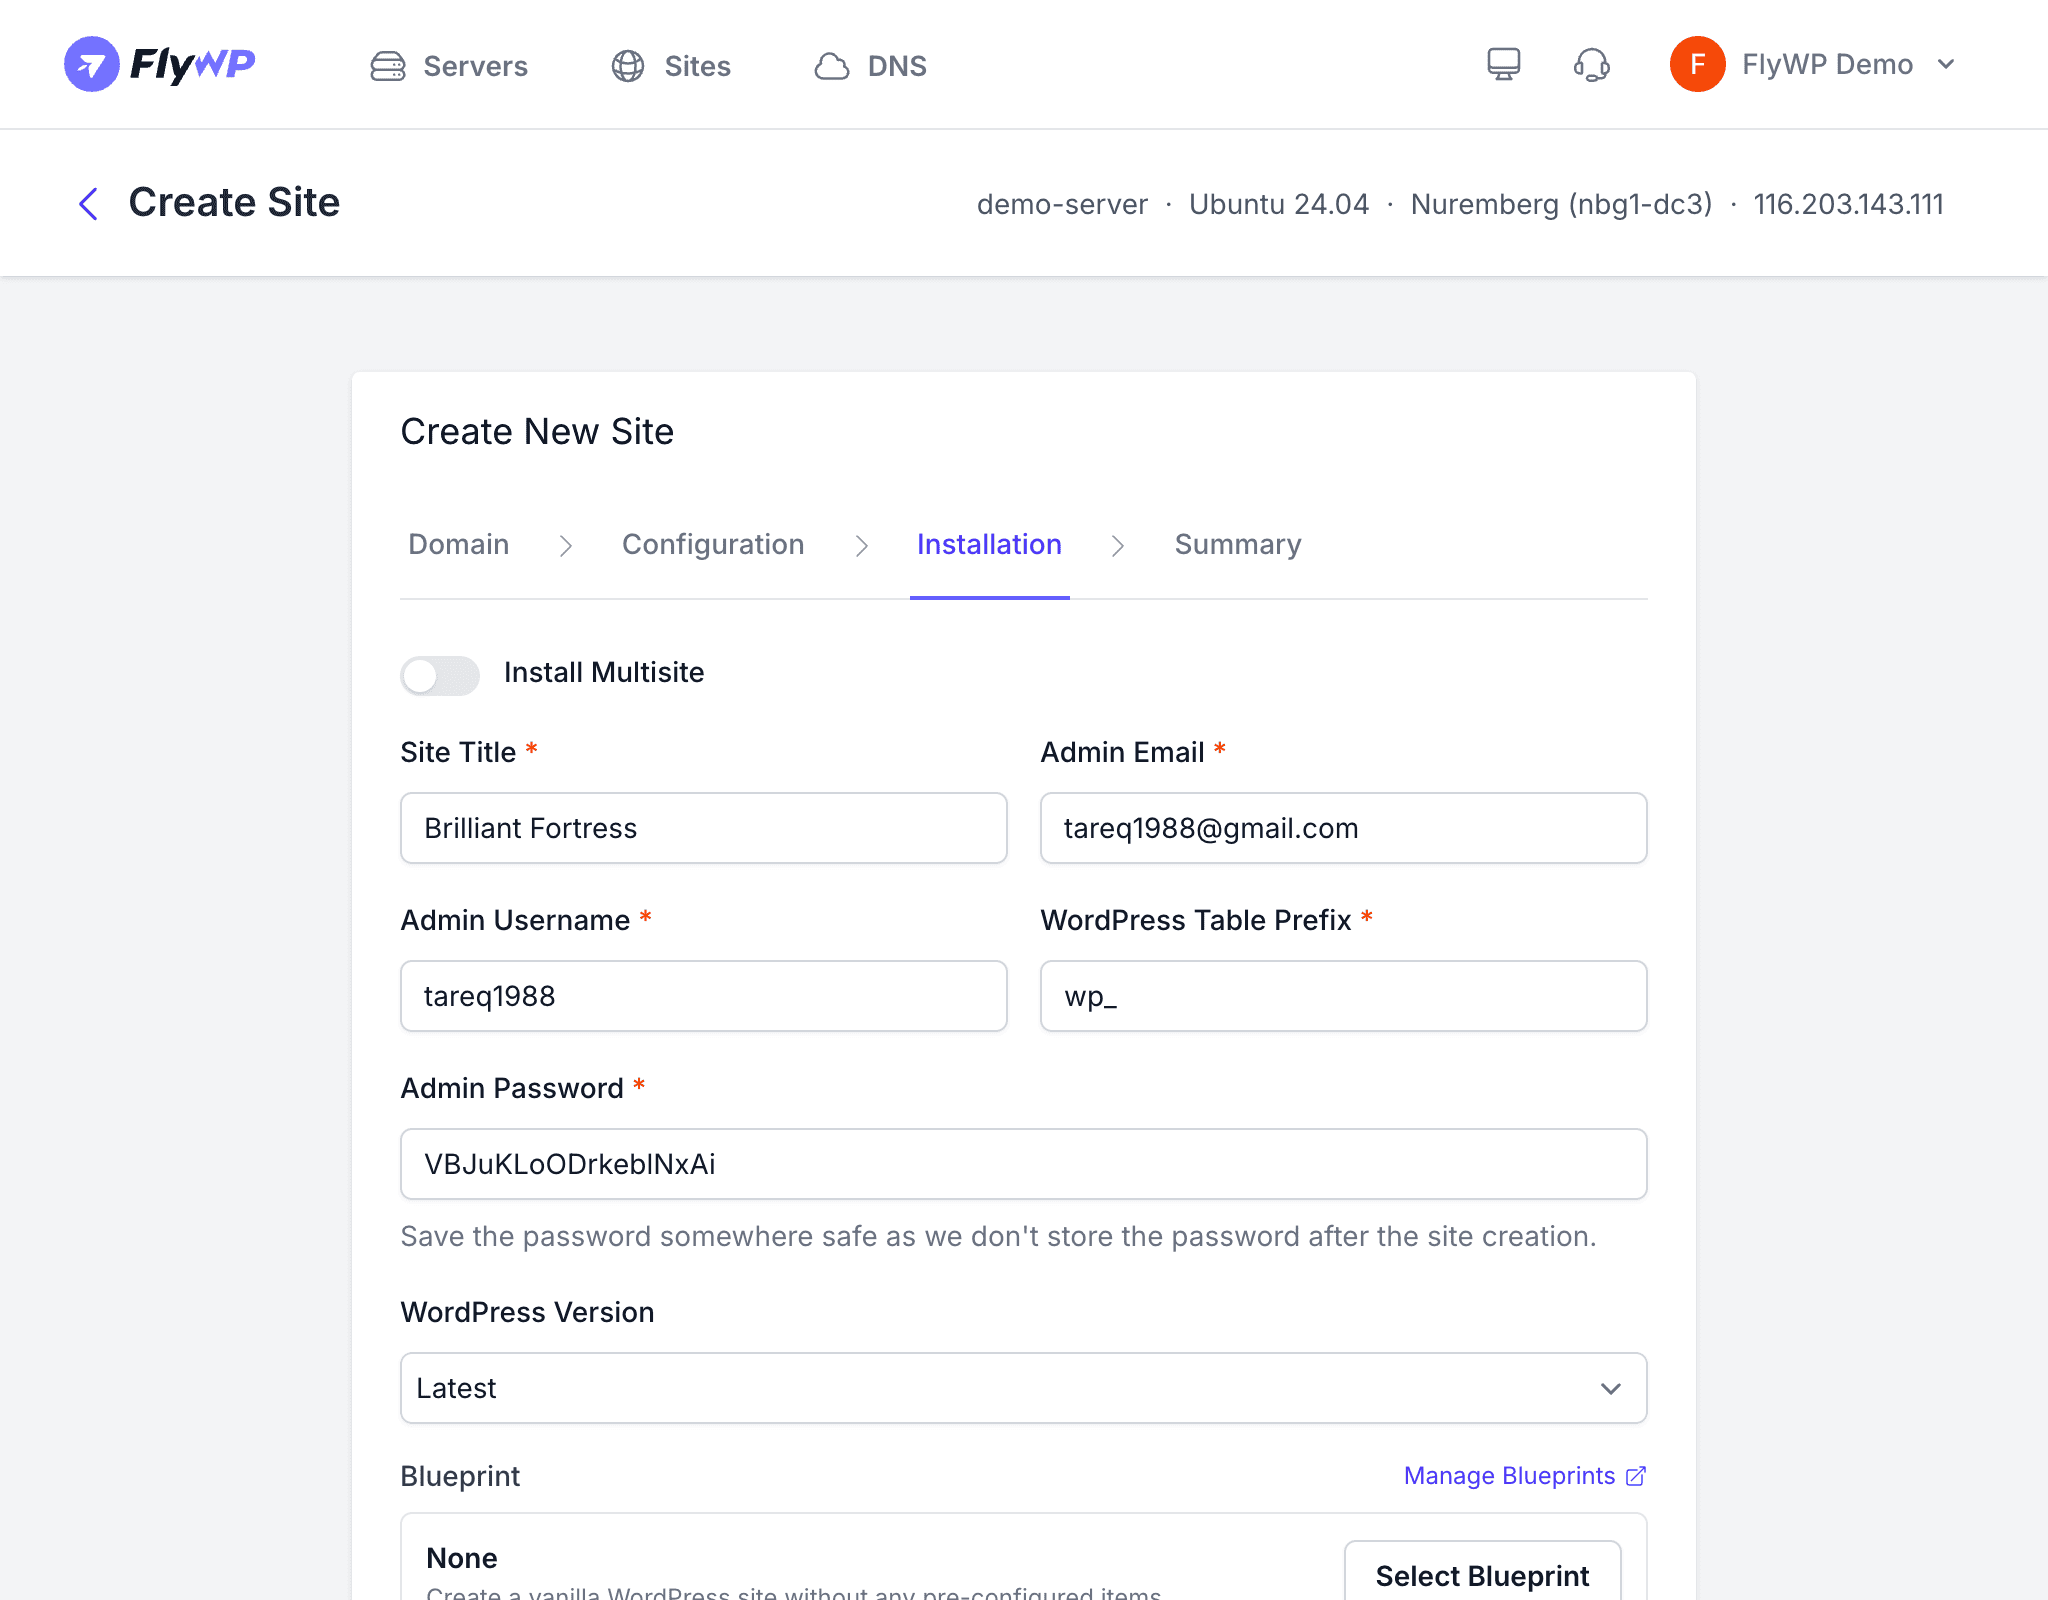
This step covers your WordPress configuration. Fill in the details carefully — some of these, like your admin username, are harder to change later:
- Install Multisite — Toggle this if you need WordPress Multisite (a single WordPress installation that runs multiple independent sites). Leave it off for a standard single-site setup.
- Site Title — The name of your website. You can change this later in WordPress settings.
- Admin Email — Used for WordPress admin notifications and password resets.
- Admin Username — Choose a unique username. Avoid “admin” — it’s the first username attackers try.
- WordPress Table Prefix — Defaults to
wp_. This is a short label that prefixes your database table names; change it if you’re running multiple WordPress installations in the same database. - Admin Password — FlyWP auto-generates a strong password. You can use it as-is or set your own.
- WordPress Version — Select Latest for the newest stable release, or pick a specific version if needed.
- Site Blueprint — Optionally select a blueprint to pre-configure your site with specific plugins, themes, and settings. Leave blank for a clean installation.
- Enable Full Page Cache — Recommended for production sites. This stores pre-built HTML pages so Nginx serves them directly to visitors without loading PHP and the database on every request, significantly reducing load times.
Step 5: Review and Create
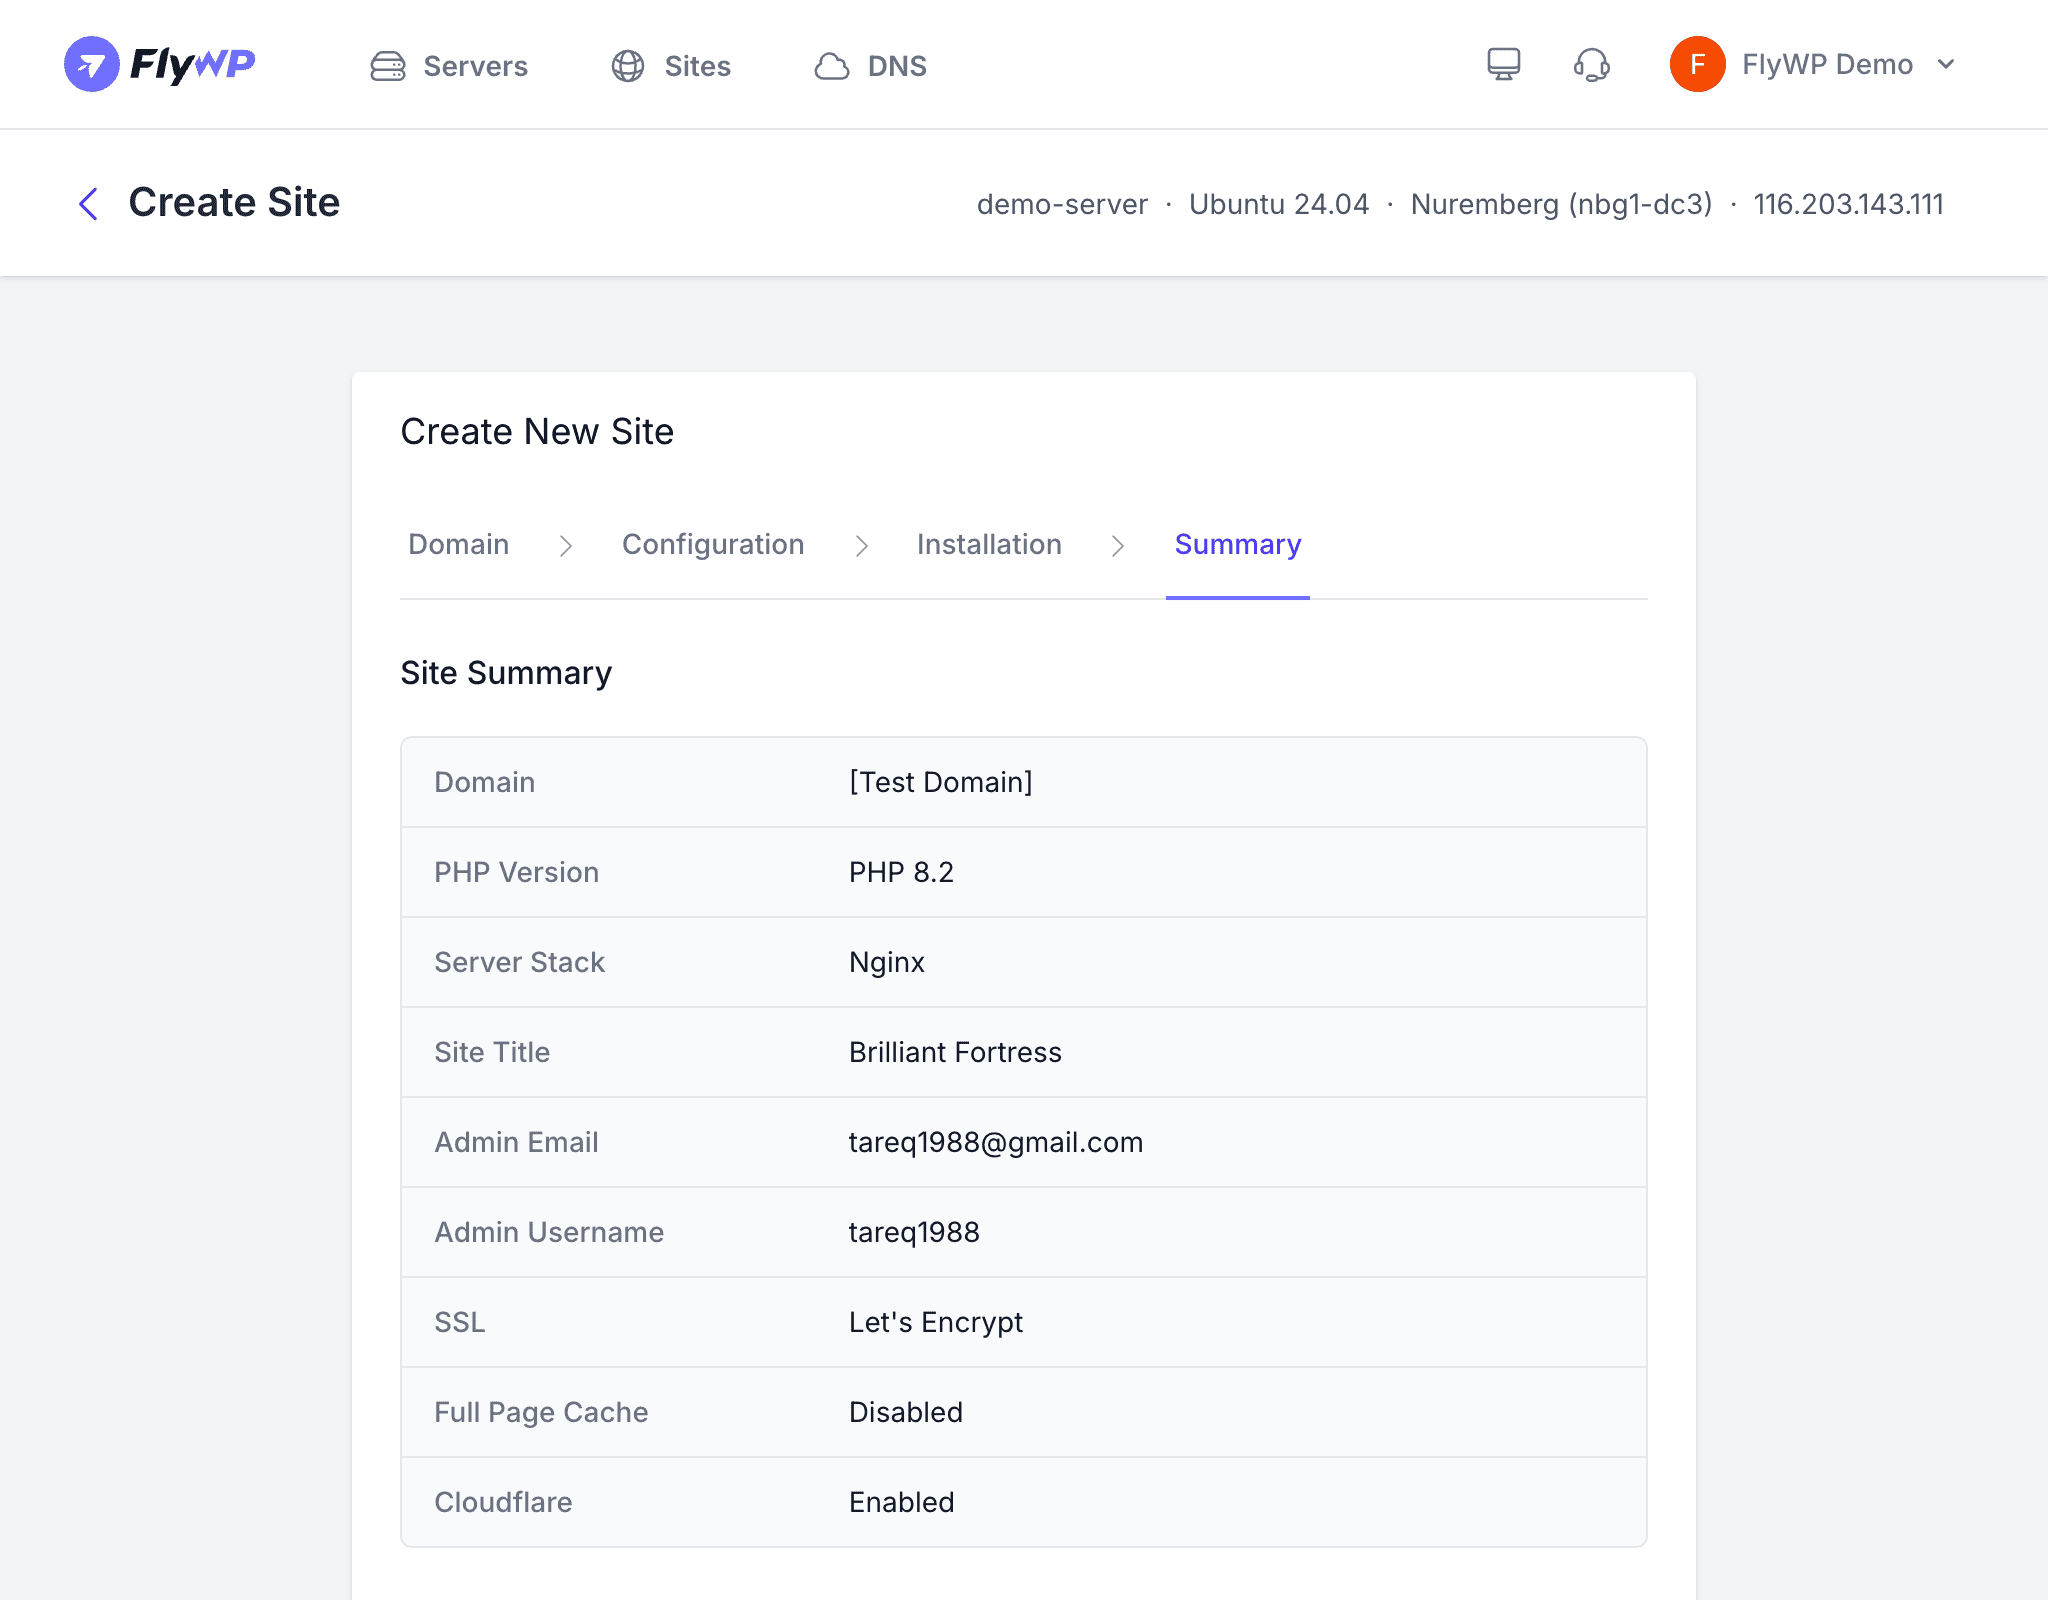
The summary page shows all your chosen settings. Review everything carefully, then click Create Site.
FlyWP will then:
- Create an isolated Docker container (a self-contained environment) for your site
- Set up a MySQL database and user
- Install WordPress with your admin credentials
- Configure Nginx with optimized settings for WordPress
- Provision an SSL certificate (if HTTPS was enabled)
- Apply full page caching (if enabled)
This process typically takes 1–2 minutes.
What Happens Next
Once your site shows Active status, you can:
- Visit Site — Open your live WordPress site in a new tab
- WP Admin — Use FlyWP’s magic login to access the WordPress dashboard without entering a password
- Manage settings — Configure caching, SSL, backups, and more from the site dashboard