DigitalOcean
DigitalOcean
DigitalOcean is one of the most popular choices for hosting WordPress sites because it offers predictable pricing, fast SSD-based servers, and data centers on every continent. By connecting your DigitalOcean account to FlyWP, you can spin up a fully configured WordPress server in minutes — without touching a command line or writing a single configuration file. This is the right starting point if you want reliable cloud infrastructure at a competitive price.
Prerequisites
Before connecting DigitalOcean to FlyWP, make sure you have:
- A DigitalOcean account — new users can get $200 in free credit through our referral link.
- A Personal Access Token (an API key — a secret string that lets FlyWP communicate with your DigitalOcean account on your behalf) with read and write permissions.
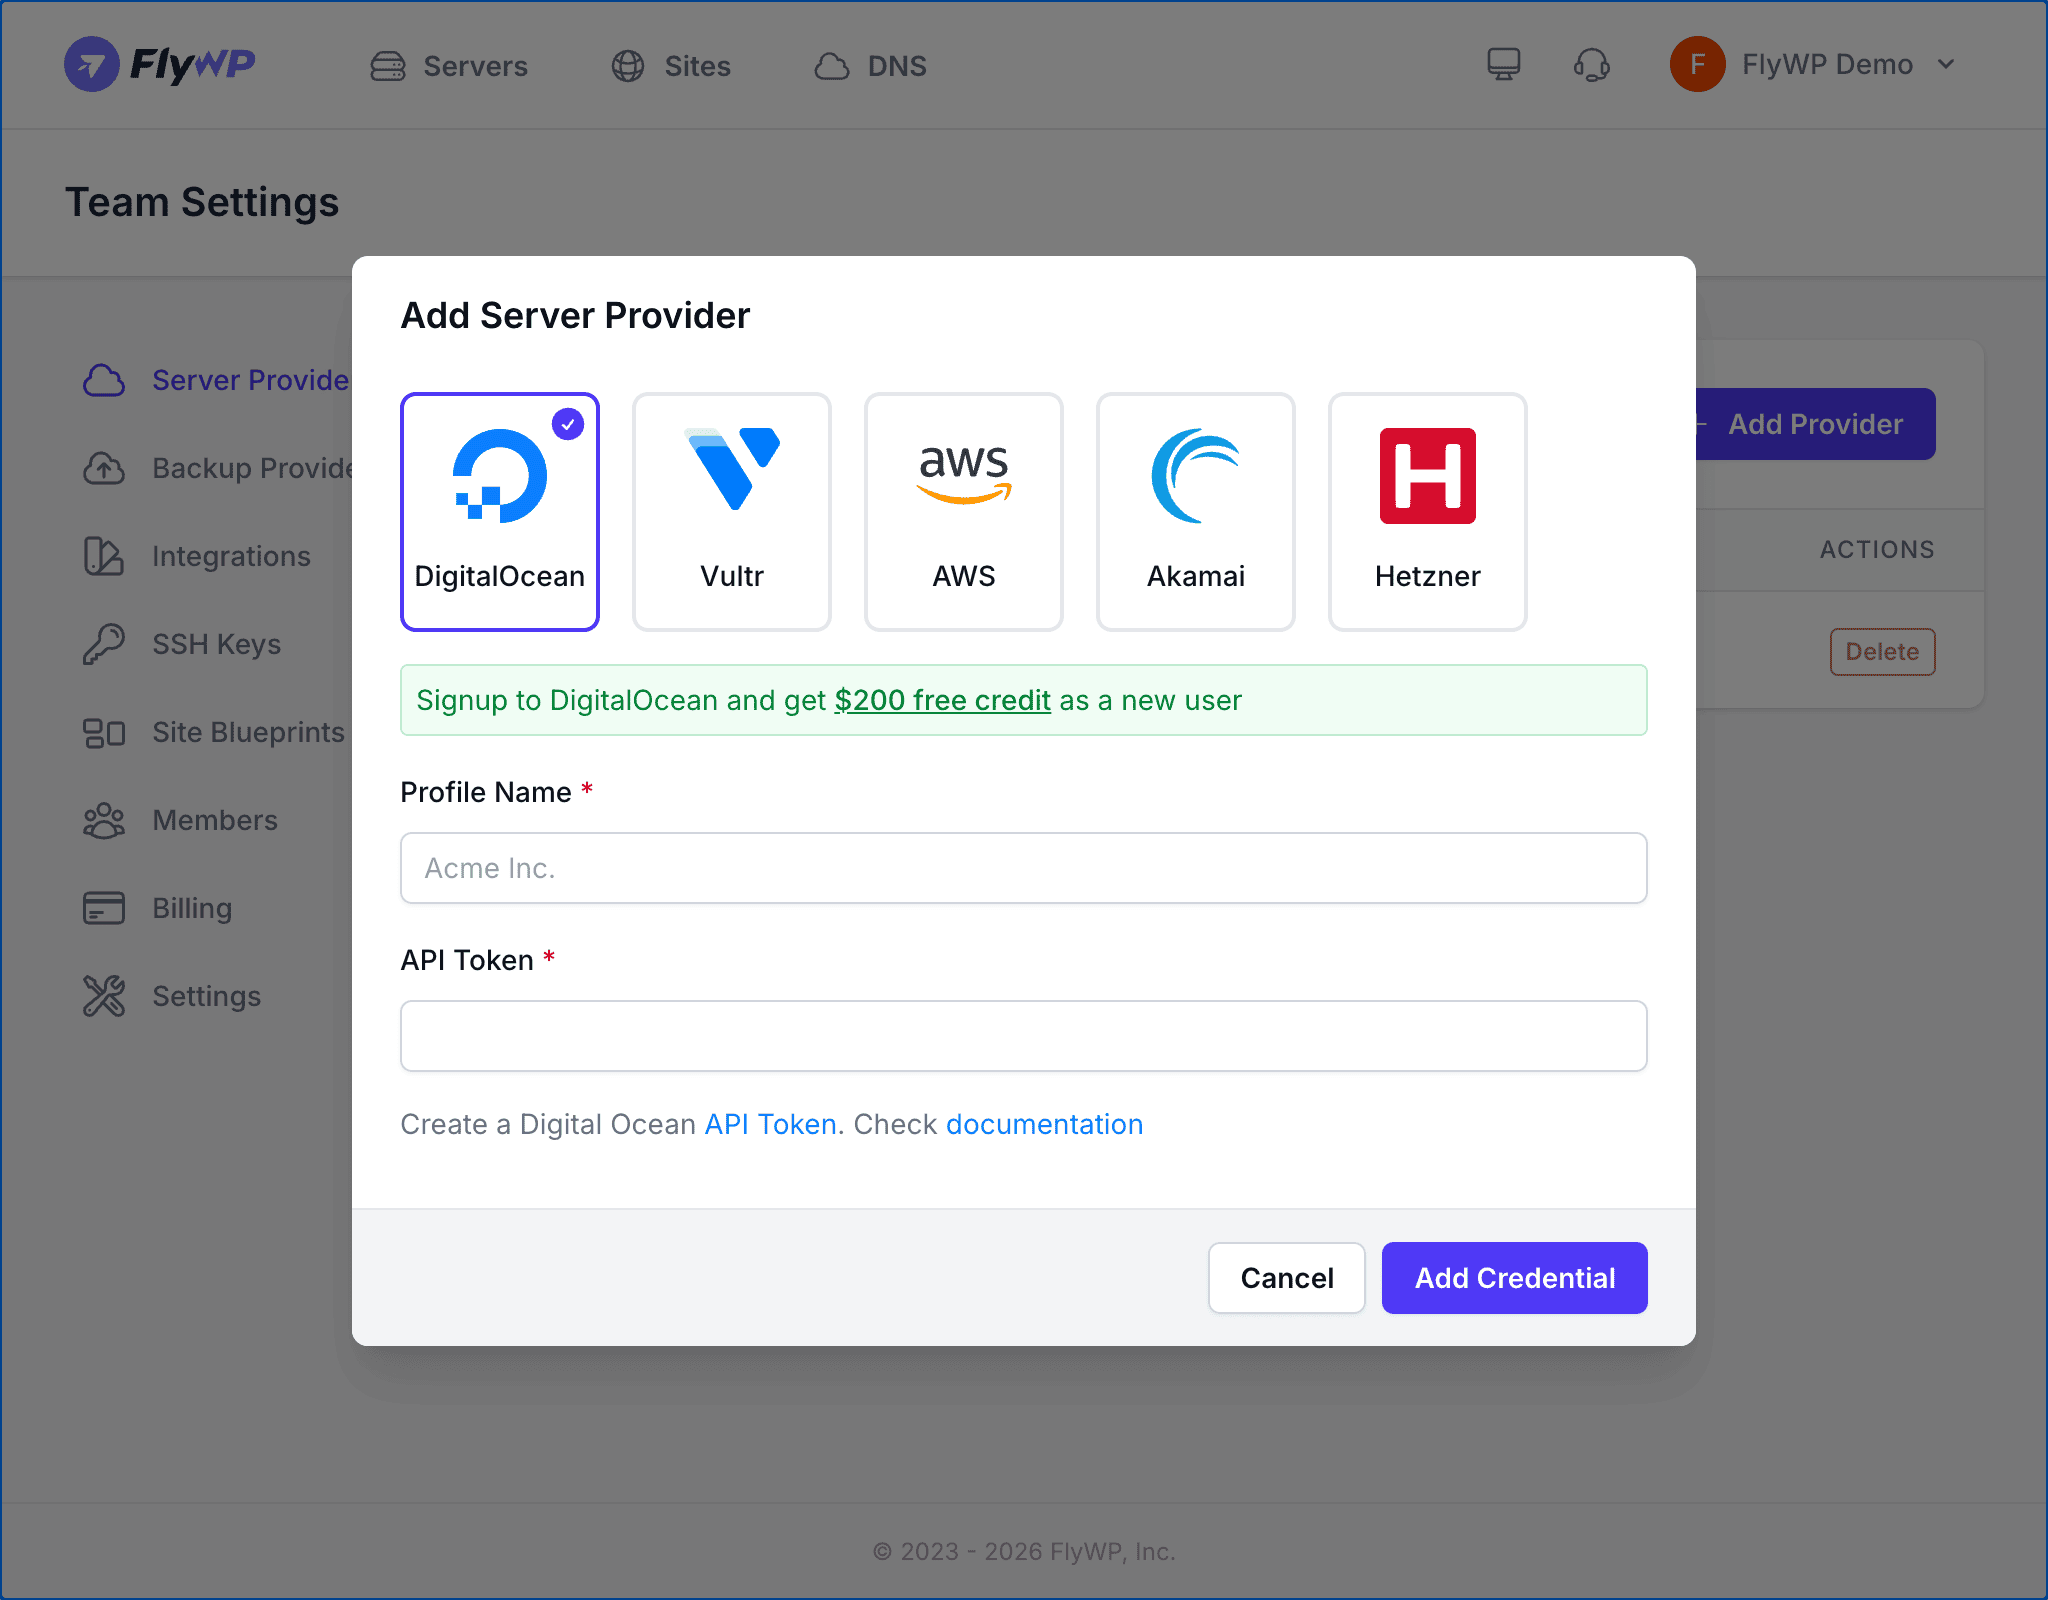
Connecting DigitalOcean to FlyWP
To add DigitalOcean as a provider, follow these steps:
- Navigate to Team Settings > Server Providers.
- Click Add Provider.
- Select the DigitalOcean icon from the provider list.
- Enter a Profile Name for this connection (e.g.,
DO Production). This must be unique within your team and can be up to 80 characters. - Paste your API Token into the token field.
- Click Add Credential.
FlyWP validates your token with the DigitalOcean API before saving. If the token is invalid or lacks the required permissions, you will see an error message.
Getting Your API Token
You only need to do this once. After generating the token, store it somewhere safe — DigitalOcean shows it to you only once.
Step 1: Open the DigitalOcean API Dashboard
Log in to your DigitalOcean account and navigate to API > Tokens, or go directly to https://cloud.digitalocean.com/account/api/tokens.
Step 2: Generate a New Token
Click Generate New Token. Give the token a descriptive name like FlyWP and make sure both read and write scopes are selected. FlyWP needs write access to create and manage servers (called “Droplets” in DigitalOcean’s terminology) on your behalf.
Step 3: Copy the Token
Copy the token immediately after creation. DigitalOcean only displays the full token once — if you lose it, you will need to generate a new one.
Never share your API token publicly or commit it to version control. Treat it like a password — anyone who has it can create or delete servers in your account.
Available Server Options
When creating a server through FlyWP with DigitalOcean, you can choose from the following options.
Server Types
Different workloads call for different hardware profiles. Here is a quick guide to help you pick the right one:
| Category | Best For |
|---|---|
| Basic | Small WordPress sites, development, and staging |
| General Purpose | Production sites with balanced CPU and RAM needs |
| CPU-Optimized | High-traffic sites and compute-heavy workloads |
| Memory-Optimized | Large databases, caching layers, and memory-intensive applications |
| Storage-Optimized | Sites with large media libraries or significant disk requirements |
Processor Options
DigitalOcean offers three processor tiers for Basic Droplets:
- Regular — shared vCPU (the virtual processor is shared with other customers), most affordable option
- Premium Intel — dedicated Intel processors with higher clock speeds
- Premium AMD — dedicated AMD processors with excellent price-to-performance
Regions
DigitalOcean has data centers across 13 regions worldwide, including Amsterdam, Bangalore, Frankfurt, London, New York, San Francisco, Singapore, Sydney, and Toronto. Choose a region closest to your target audience to reduce latency (the time it takes for data to travel between the server and a visitor’s browser).
Web Server Stack
DigitalOcean servers provisioned through FlyWP use the Nginx web server stack. Nginx (pronounced “engine-x”) is a high-performance web server widely used for WordPress hosting.
Pricing
DigitalOcean uses USD-based pricing billed monthly or hourly. Plans start at $4/month for the smallest Basic Droplet. You are billed directly by DigitalOcean — FlyWP does not add any markup to infrastructure costs.